Friday, December 17, 2010

'Tis the Season to Be Festive!

Every year at this time, my family (as I sure yours as well) has many different types of traditions. The many traditions that my family has have evolved throughout the years, but this year our traditions are somewhat different. Usually, my mom will make a delicious foods like toffee, eggnog, and gingerbread; while my sister gets busy making batches of party mix (honestly, I don't know how it became a Christmas tradition, but now it is) since we tend to go through one a night. I'll be making baked goods, and my Dad generally supervises the tree, as well as helping us make sugar cookies.

Like I said, our traditions are a bit different this year. My parents started a giant kitchen re-build back in July...and well, we still don't have an oven, or a stove. I came home for Winter Break from school and it took me two days to figure out where the food was now being kept. So, this put a bit of a damper on our holiday cooking. But, we didn't let it stop us!

This Thanksgiving, we went to visit my sister's instead of having the whole dinner at our house (since you know, we didn't have an oven or a stove). Now, my sister hasn't been able to participate in holiday cookie making for awhile now since she is a responsible adult and has a job. Therefore, we decided to do the cookie making at her house during Thanksgiving this year.


Sugar cookies has always been my dad's thing to do with us, and we go all out. Sometimes we'll make the dough from scratch, but since my sister isn't known for her baking skills (we used to say that she could burn water), we bought pre-made sugar cookie dough.

We start out with the cookie dough, and it's best to have it at room temperature, so make sure to take it out of the refrigerator 1-2 hours before you plan to roll out the dough. Take about a quarter to half of the dough, and roll it out onto a floured board. The flour prevents the dough from sticking to the board and later, to the cookie sheets. Roll out the dough until it is about a quarter of an inch thick. Next, use cookie cutters to cut out desired shapes. Again, my sister isn't Susie Homemaker, so she didn't have any cookie cutter, so we used milk glasses and shot glasses, and our own artistic prowess (of which we have none).

Or you can make fun stuff like my dad did
Then, we took the cookie cutouts, and placed them onto a cookie sheet. Next, you can either leave the cookies plain to be iced later, or put on sprinkles now for simple sprinkle cookies. Bake the cookies according to the directions on the packaging, generally at 375 degrees Fahrenheit for about 10 minutes. I have found that you only need to cook them for about 7-8 minutes if you make them thinner like we have. 

Continue rolling out the dough onto the board until you have no dough left. Set aside the cookies onto cooling racks while you make icing.

Icing is actually pretty darn easy to make, so I'll give you the recipe here:
1 box powdered sugar
1/4 - 1/2 cup milk
1 teaspoon vanilla

Combine the powdered sugar and the vanilla in a bowl, and add the milk one tablespoon at a time (I used a shot glass, and seemed to work well enough). Fully combine the tablespoon of milk each time before you add more. It is very easy to overdo the milk, as not much is needed to make the frosting. Once you reach a desired consistency, you can separate the frosting into separate containers so that you can dye them colors.


Once you have the frosting, go crazy with frosting your cookies and sprinkles!


Happy holidays to you and yours!

Saturday, December 4, 2010

Pumpkin Cheesecake & Cheesecake-lets

Now, I have never been the biggest fan of cheesecake. I will eat it when the time comes (like when we go to the Cheesecake Factory; then I will eat all $7 worth of that giant piece of cheesecake they give you that probably has about 50,000 calories in it), but I have never actually made it for myself. So, the opportunity presented itself  in the form of my friend Jessica's 22nd birthday (yes, the same Jessica who helped me save a piece of the hamburger cake).

Jessica had mentioned in passing that she loved cheesecake, so all I had to do was figure out which kind she liked the best. I gave her roommates the stealthy task of discovering, and a few days later I got a text message simply saying "pumpkin". Well then, she'll get pumpkin cheesecake!

It is the perfect time of year for it because I could get everything I needed pretty cheap because it was right after Thanksgiving. Without further ado, here is Pumpkin Cheesecake:

Disclaimer - cheesecake recipe adapted from Paula Dean's cheesecake recipe at the Food Network.

Your cheesecake is made up of two parts: the crust, and the actual cake.

Directions: Preheat oven to 350 Degrees Faranheit. Grease 9-in round pan* and set aside.
*You are suppose to use a spring-form pan, but alas, I did not have one. Therefore, I used a regular cake pan and it worked fine.
Crushed graham cracker

Crust:
Ingredients
1-3/4 cups crushed graham crackers
3 tablespoons brown sugar
1/2 teaspoon cinnamon
1 stick (1/2 cup) melted butter


Directions
Crush graham crackers in plastic bag (I found that about one sleeve of graham crackers is about the right amount crushed). Add the graham crackers, brown sugar, and cinnamon together and stir. Add melted butter  and stir together. Press into greased pan and set aside.

Cake:
Ingredients
3-8 oz packages of cream cheese, room temperature*
1-15 oz can of pumpkin pureee
Me trying to get my cream cheese at room temp.
3 eggs plus one egg yolk
1/4 cup sour cream
1-1/2 cups sugar
1/2 teaspoon cinnamon
1/8 teaspoon ground nutmeg
1/8 teaspoon ground cloves
2 tablespoons flour
1 teaspoon vanilla

Directions
Beat the cream cheese until there are no lumps in the bowl. Next, add the pumpkin puree, eggs and egg yolk, sugar, the sour cream, cinnamon, nutmeg, and cloves (you can be liberal with the spices, the directions aren't exact). After thoroughly mixed in, add in flour and vanilla (again, you can "eye ball" it). Mix well.
Pour the cake batter into the prepared crust, and make sure that it is even in the pan. The batter will be pretty liquid-y at this point. Place the pan in the oven at 350 degrees F for one hour.

Remove the cake from the oven -- it is done when you can wiggle the pan and the batter doesn't jiggle. Or, if you press the top of the cake and it doesn't spring back.

Let the cake cool down (about 20-30 minutes) and then place covered in the refrigerator for at least 4 hours.

Et voila!
 
* Now, when I put my cream cheese in the mixer, I thought it was room temperature. And it definitely wasn't! I mixed and mixed thinking that it was pretty smooth, and then when I added in all the rest of the ingredients I ended up getting a lot of lumps. That is why I ended up using the whisk for my Kitchen Aid -- to try and get some of the lumps out.

As you can see in the picture, I ended up with more than just one cake! I think the spring-form pans are a bit taller, so I poured in about 3/4 of the batter to the 9-in round pan and it was full. So, I quickly put together some more crust (I cut everything in half) and then made what I like to call "Pumpkin Cheesecake-lets", or tiny pumpkin cheesecakes in muffin tins. I ended up cooking those for about 40 minutes in the same oven as the cheesecake.

In the future, I would probably bake the crust some before putting the cake. It was a good crust, but it ended up being more soft than I thought it would be, and I like a harder crust.

And as for the spices, I tend to just "eyeball" everything that small. So, every time I make it the flavors may be a little bit different, which I am perfectly ok with. I operate with the firm belief that some of these ingredients are suggestions, so I will change them as I please.

And Jessica loved her cake!

Sunday, November 21, 2010

Hamburger Cake for Susan

I set out to do this post with my friend Susan in mind. Her 21st birthday was just a few days ago, and I wanted to make something special for her.

I was playing around the internet a few nights ago (when I was suppose to be studying for a Biomaterials midterm), when I came upon a website with fun cakes. I was clicking around, seeing all sorts of cool cakes that I really didn't have the experience to make, when I saw some hamburger ones. And bam! a great idea popped into my head.

It was to be my friend Susan's birthday two days later, and some friends were taking her to Olive Garden and Harry Potter as a birthday present. Since I love to bake, I realized that I should make her a cake, because well, she loves cake and desserts (who doesn't??).

Now, the reason for the hamburger cake was twofold. First, it was made in separate layers, so it looked like I wouldn't have to do any carving or anything like that, which is good since I am not very artistic. And second, because Susan is on a month-long vegetarian bit, where we bet her $1 (yes, only one dollar) that she couldn't be a vegetarian for a month. High stakes, indeed. But if she wins, I am taking her to KFC for a Double-Down (you know, one of those sandwiches that is two pieces of chicken with cheese and bacon between them). So it's on!

I was so excited about this cake that I could barely sleep before my midterm, and that's all I thought about all day.

Supplies & trusty Kitchen Aid
Here's how I tackled the cake:
1 box yellow cake (I still haven't started making cakes from scratch...the one thing I still make from a box)
1 box fudge brownies
2 tubs white icing (or butter cream, which is delicious and adds a slight oomph to the cake)
1 tub chocolate icing
15 chocolate oreos, crushed into pieces
10 graham crackers
20 graham cracker sticks
1 cup white chocolate chips
Yellow food dye, red food dye
Black sprinkles


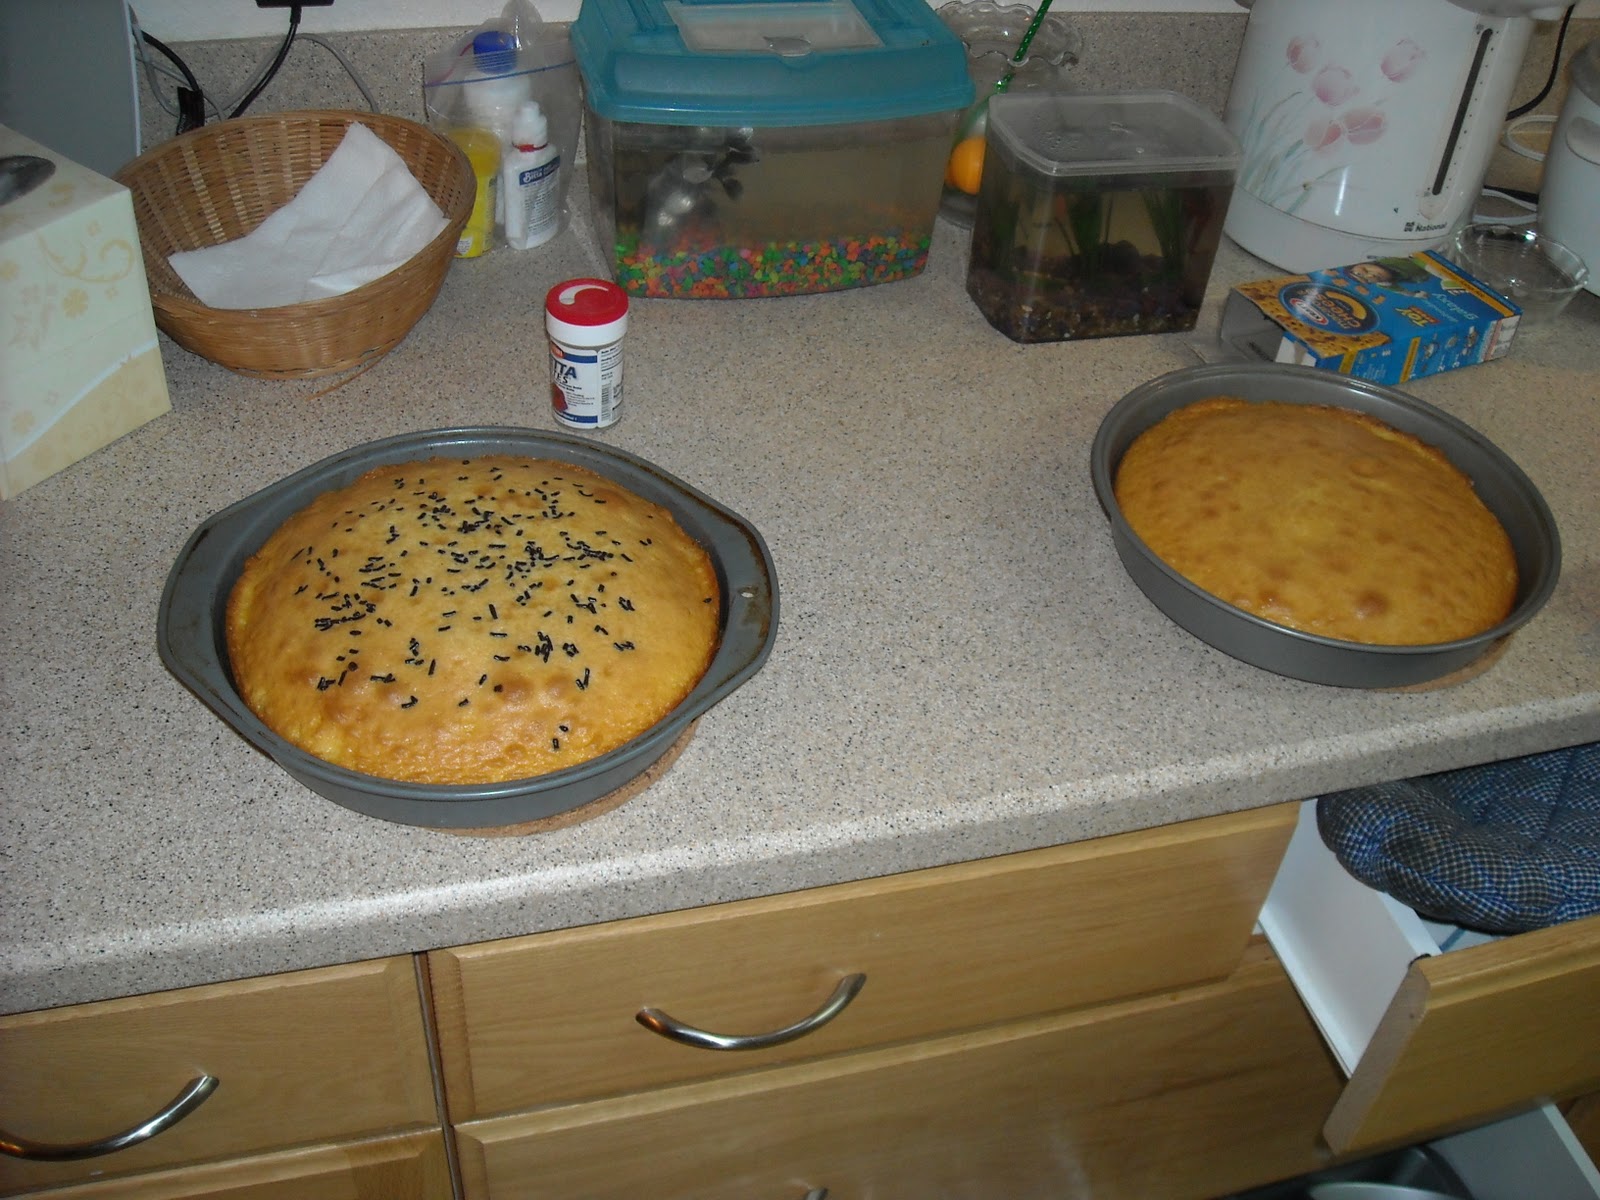
To begin with, I made the yellow cake. I baked it in two 9-in rounds according to the directions on the box. I put more than half in the pan that would be the "top bun", so that it would be more like a hamburger bun.  Now, Susan doesn't like too much frosting, so I planned from the beginning not to frost the top. Therefore, I put on black sprinkles before I baked them on the top bun, but if you were going to frost later then you could just leave it for after frosting.

After the cakes cooled I placed them  in the fridge overnight (you only need a few hours) so they would be easier to frost.

Next, I made the hamburger layer. I used brownies, because Susan likes those more than chocolate cake, and it gave it a nice texture difference. Again, I baked according to the box directions in a 8" round. I put about 3/4 of the mix in the round, and the rest in another pan for my own consumption. If you're not selfish, you could put all of the mix in....

While the brownies were in the oven, I went on to making the "french fries". I got graham cracker sticks and white chocolate chips. I melted the chocolate chips over the stove, and had some trouble with this. As the chips were melting, the mixture was a bit thick, so I decided to add in water to thin it out a little -- BIG MISTAKE. The mixture got all goopy and started to fall apart. I threw in about a tsp of vanilla, and that seem to help it a little bit. To make the graham crackers look like french fries, I added a few drops of yellow food coloring to make a soft yellow. I dipped the graham crackers in the chocolate mixture and then placed on wax paper on a cookie sheet. I put the cookies in the fridge over night as well.

The next morning, I pulled the bottom bun cake out of the fridge, and began to shape it slightly. I cut the top off the cake off just to even it out. However, due to my clumsy nature it wasn't that flat, but icing soon fixed that. See that pile of leftovers to the right? Yeah, ate that. It was delicious.


Next, I "dirty iced" the bottom layer, and stuck it back in the fridge.


Fast forward a few hours, and I pulled the bottom bun out of the fridge. I iced the layer with white frosting dyed red (well, more pink. I need to find a good food dye) to make it look like ketchup. From there, I took the 8" brownie out of the tin and carefully placed it on the bottom bun. It's important to be careful with this step because the brownie is more dense than the bottom cake so if you just plop it on there there is a good chance something will just fall through.

To make the brownie look like ground meat, I took the whole tub of chocolate frosting and placed it into a tupperware bowl. I then crushed up some chocolate oreos (just with my hands, it doesn't need to be that well done). I then mixed it up, also smashing the oreos more with my frosting knife. From experience, there is no need to use the whole tub of frosting; it probably would have been enough to just use about 1/2 tub of frosting and 9-10 cookies.

I patted the frosting-cookie mixture onto the cake. There's no real need to "frost" since it is a thick and chunky mixture. Also, if you just pat it on there then it will look uneven and hopefully more like a meat patty (but infinitely more delicious....). Just pat the frosting mixture onto the top and sides of the brownie layer.

Finally! We are almost at the top layer. Next, I dyed a little bit of frosting (about 3/4 cup of white frosting) orange by putting in about 8 drops yellow food coloring and 2-3 drops red food coloring. The purpose of this was to make cheese! I frosted 5 graham cracker halves with the orange frosting and placed near the outside of the "burger". When I placed the top on, you could only see two of the five, so you should place the graham halves closer to the outside. Also, by the time we ate this it had been sitting out for a day so the graham halves were nicely soft and not crunchy like usual.

Now! The final cake! I took the top layer out of its pan (which I should have done earlier in the day, I just completely forgot). Now, thank goodness my friend Jessica was there, because she helped pull the pan off the cake, and when she did part of the side pulled off, and she had quick hands and caught it before it hit the floor. You can't see it in the photo, but in the back there's about a 4 inch long and 1 inch wide piece that is being held to the rest of the cake with frosting and toothpicks. But what you can see is my handprint, which means that I didn't leave the cake in the oven long enough.

All I did was place the top on, and voila! We have a cake! I added the french fries and what was left over of my red frosting and we have the whole cake:


I was very excited about it: 


Susan loved her cake (especially the fries -- they were a huge hit), and it was delicious when we finally ate it the next day. Not loads of frosting; just enough to make the rest of us eating it happy and not too much to deter Susan from eating it. 
Enjoy!

Monday, October 25, 2010

In the Beginning

I have loved baking for as long as I can remember. At age 6, I told my mom that I wanted an Easy Bake Oven; and instead of getting one on Christmas morning, she taught me how to use her KitchenAid mixer (the beginning of a long love affair between the two of us) and the real oven. And I've never looked back.

By the time I was eight, I had memorized the Nestle Tollhouse recipe for chocolate chip cookies, and I would routinely make them, much to the chagrin of my mother. By 10, I was trying out different dessert recipes, and by 12 I had made my first apple pie from scratch, including the crust. Nowadays, I have my own KitchenAid (grey, a Christmas present from my mom last year), and at 22, I am discovering a whole new side of food and love of it.

This will be a blog of my most favorite recipes; my many attempts at different methods, and the failures that happen to accompany them (redirection, not failures!). Pictures will accompany, because I hate recipes that don't have pictures and therefore almost never make those.

Read, enjoy, and I hope that you discover new tastes!